How to create your very first video case study

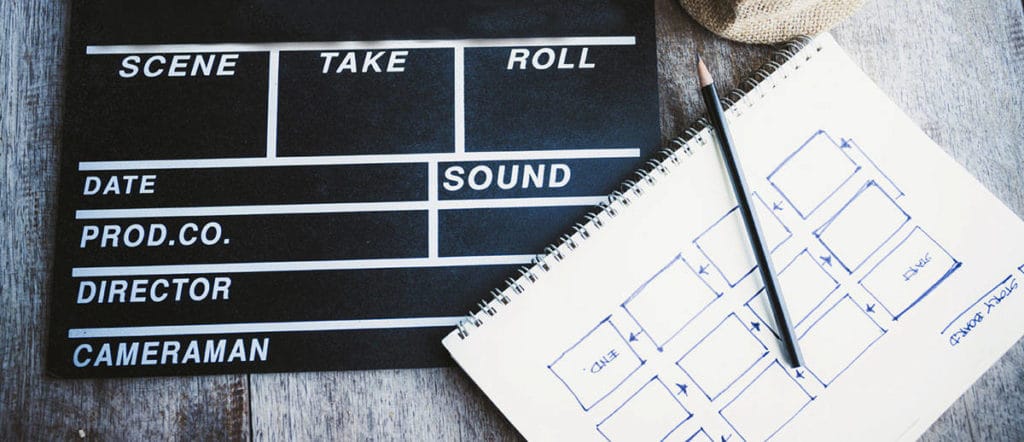
To complement our portfolio of work, we decided to produce a video case study and we’re really happy with how it turned out. People have asked us how we put it all together so we have written this guide for those interested in creating their own.

Step 1: Prepare a storyboard for your video case study

Prepare a storyboard that will give other people a good idea of what you’re actually looking for and what you want to achieve with the video case study.

  • Prepare a storyboard that will give other people a good idea of what you’re actually looking for and what you want to achieve with the video case study.
  • You will need to lay out each scene to make sure that you get the outcome you expect.
  • Aim to make the video 2 mins long maximum (otherwise you risk losing the attention of your audience).  Choose your scenes very carefully.
  • Try to achieve a good balance between showing your work and showing people in the video (people working or giving an interview).

 Step 2: Write a voiceover script

A voice over guides your audience through the case study so the script you use is of paramount importance.

  • A voice over guides your audience through the case study so the script you use is of paramount importance.
  • Your voice over has to say all of the important information in a few, short sentences. We worked tirelessly on every single word in our script until we arrived at a final script that we were happy with.
  • You can commission a copywriter to help you but be careful: you need a copywriter that understands that the copy they are asked to produce is intended for voiceover supporting your specific video case study storyboard (it’s not a written text for a website or a blog post) – it has to have a punch and energy and has to fit your storyboard.

Step 3: Find a videographer & editor

It's important to work with an experienced and talented videographer and editor (they can be the same person).

  • It’s important to work with an experienced and talented videographer and editor (they can be the same person).
  • Ask for recommendations from friends or simply search for the type of videos you want to make on Vimeo or YouTube – and contact the authors directly.
  • Once you select your videographer, show them your storyboard for your video case study and ask for feedback.

 Step 4: Do test rehearsals for your video case study

Once you’ve discussed the storyboard and the whole process with your videographer, do a couple of test rehearsals.

  • Once you’ve discussed the storyboard and the whole process with your videographer, do a couple of test rehearsals.
  • You can do the test rehearsals on your own (for example borrowing your friend’s camera and practising) or ask your videographer to do test rehearsal for you.
  • Review the test video shoots and make notes about where you can improve.
  • Test rehearsals help you see how your initial ideas actually look on camera, for example, our initial approach was to read carefully prepared scripts, word by word, in front of the camera. After the first test rehearsal and viewing the footage, we realised that it would be better not to do that and instead have a set of basic questions to guide the interviewee and then just let them answer the questions naturally on the camera; this helped responses to the questions to be more natural and not over-scripted. Anything tense/over-practiced is magnified on camera.
  • We also realised that sitting on a chair when being interviewed looked better than standing – people looked more relaxed and natural.

Step 5: Prepare for the video shoot

Once you are confident about doing the actual video shoot for your video case study, preparation for the BIG day starts.

  • Once you are confident about doing the actual video shoot for your video case study, preparation for the BIG day starts.
  • Unless you own the video equipment, you will need to hire it. Charges for hiring are usually costed per day and the same day applies to your videographer. So you really want to make sure you are ready when the big day comes because repeating the video shoot can be costly.
  • We had to do ours twice – so our costs for hiring equipment and videographer doubled instantly. You want to avoid that if you can.
  • Where to hire the equipment? Your videographer will most likely have their favourite shop in mind so just go with their suggestion.
  • When the BIG day comes, the time goes quickly. So prepare well in advance to ensure that you make the most of the shoot. Here are the most important steps:
    1. Meet with your videographer, show them your final script, show them all of the locations where you want to shoot videos, and discuss the entire program of the day. Adjust your plan or timings if necessary and leave some gaps for surprises.
    2. Decide on the big date. There are a lot of moving parts and you have just one day to make sure that everything comes together nicely. If you plan to interview your client as well as your staff, you need to co-ordinate the dates between your internal team, the client team and your videographer. Not an easy task.
    3. Once you have your chosen date confirmed, brief everyone who will participate in the video shoot in as much detail as possible (what will happen, where, what is expected, what clothes to wear etc.) – people tend to be nervous about performing on camera so if there is anything that you can do to ease their nerves then that will help the shoot to go smoothly. Give them as much information as possible and emphasise that they don’t need to worry as you can cut the footage and choose the best bits. This will hopefully help them to relax and, in turn, be more natural on camera.
    4. Notify everyone who will be affected by the video shoot (e.g. security staff in your building, reception, the building manager) – you don’t want any surprises on the day, for example – realising that someone is not happy about the video shoot in the building. This especially applies if you do a video shoot in a public space or at your client’s premises.
    5. Finalise preparations by getting all sorts of assets ready in advance for the shoot. We wanted to convey an idea of meetings and collaboration, so we printed project documentation and screenshots of the website a day before the shoot and ‘practised our meetings’. Anything you can do in advance before your BIG day will help.

Step 6: During the video shoot

Set aside enough time to prepare the scenes. It took us around three hours to set up our scene (equipment, cameras, lighting and testing shots etc).

  • Your videographer will guide you through most of the shoot. You just need to watch the time and direct your internal team as needed.
  • Set aside enough time to prepare the scenes. It took us around three hours to set up our scene (equipment, cameras, lighting and testing shots etc).
  • Don’t forget to enjoy the day. It’s a unique experience and good fun but full on, expect to be exhausted at the end of the day!

Step 7: After the video shoot – review the video recordings

You will produce a lot of video content in one day so there will be a lot of footage to go through. Make notes about the exact times of when you liked a footage and send the notes to the editor.

  • You will produce a lot of video content in one day so there will be a lot of footage to go through.
  • Make notes about the exact times of when you liked a footage and send the notes to the editor.
  • The video editor will then prepare the first draft cut of the video footage.

Step 8: Record a test voiceover

You can use your phone to record a test voice over (we did this) as the quality of the sound does not matter too much – you just need to test your script.

  • You can use your phone to record a test voice over (we did this) as the quality of the sound does not matter too much – you just need to test your script.
  • It’s important to use a test voice over first because you want to make sure that the voice over script you prepared fits the draft cut of the footage. You will most likely need to make some final changes to both: the cut and the script too.

Step 9: Find a soundtrack

A soundtrack is the background music that accompanies your video case study. Choose a soundtrack that gives you the right pace and mood for the video.

  • A soundtrack is the background music that accompanies your video case study.
  • Choose a soundtrack that gives you the right pace and mood for the video.
  • We found that the best online libraries with soundtracks you can buy are: Vimeo Enhancer (the service has since been shut down) or PremiumBeat.
  • Be careful about using just any type of music that you like. Most music has copyright attached to it so you really want to make sure that you purchase the usage rights for your soundtrack or find copyright-free music.

Step 10: Prepare animations

If you intend to use animations as we did in our case study (e.g. the animated numbers on the map or the website elements fading in one by one), you will need to work with an after-effects specialist.

  • If you intend to use animations as we did in our case study (e.g. the animated numbers on the map or the website elements fading in one by one), you will need to work with an after-effects specialist.
  • Give them your script and explain in as much detail as possible what you’re looking for so that they can create the right animations for you.

Step 11: Recording the final voiceover for your video case study

After several iterations of your video cut using a test voice over, you will finalise your voice over script. Now is the time to commission a voice over artist to read the final script for you.

  • After several iterations of your video cut using a test voice over, you will finalise your voice over script. Now is the time to commission a voice over artist to read the final script for you.
  • When you are in the process of selecting the voice over artist, listen to the recorded samples of the work that they have undertaken for other clients and judge whether they sound like ‘you’ (e.g. your company).
  • We were looking for a young, agency-like type of voice, preferably female and we paid particular attention to their ‘corporate’ recordings as it aligned well with our video footage.
  • Once you find the right artist, ask them to send you a sample voice over, e.g. the first sentence of your script. That will help you determine if they ‘sound’ right.
  • Once you choose the right person, ask them to record the script in varying speeds – normal speed, fast and really fast reading. We needed a very fast reading to match the pace and convey the sense of energy that we wanted.  Our voice over artist did four recordings for us and we’ve chosen the fastest reading speed.
  • We found voicespro.com a particularly good site for browsing portfolios of voice over artists.

Step 12: Final cut and promotion of your video case study

And this is the end of a very long and exhausting journey! Open the champagne – you deserve it!

  • After a few draft cuts and adding the final voice over audio, you will arrive at the final cut with your editor. The last thing is to add opening and closing titles. We chose to use text that explains what the video is about for opening titles and our company logo for the closing titles.
  • And this is the end of a very long and exhausting journey! Open the champagne – you deserve it!
  • After it’s all over, don’t forget to ask your editor to provide you with all of the raw footage of everything that has been recorded and the source files of the final cut (in case you would like to edit it yourself later or re-use parts for something else).
  • Finally, shout about the work to the world. Put your video case study on social media, on your website and spread the word about it!

Budget

  • Renting video equipment: £1,000
  • Video shoot + editing: £350
  • After-effects animations: £300
  • Voice over: £200
  • Soundtrack: £30
  • Total = £1,880

The total raw costs are not high but they do not reflect the amount of time that our staff put into the creation of the case study.

Good news is that given the positive feedback that we have received, we consider the project a success and worth the investment.

Final thought on our first video case study

Will we do it again? Maybe. It’s a lot of work and it took a lot of our time to put it together. But the results were worth it – the video case study communicates our message with impact. If we do it again, we will take everything that we learnt and attempt to create a video case study completely in-house.

Good luck and let us know how you get on!

Let's connect